

Configure Single Sign On
Business Background
Configure SSO to invoke access to an external Titan Web project. Users in your Salesforce community can use the Titan Web project. You can bring custom variable attributes from Salesforce to your project.
Titan Solution
- Any Salesforce Push or Get will run on the logged-in user’s profile. For instance, if a community user creates a new contact in Salesforce, the contact will be created with that user’s profile details.
- Ensure the user’s permission in the Titan Web project is the same as the permission level in Salesforce.
How to Video
- 0:08 Introduction.
- 0:38 Learn how to set SSO.
- 0:59 We will show you how to configure my account.
- 1:35 Learn how to create a certificate.
- 2:11 Learn how to create a new connected app.
- 4:20 We show you how to create custom attributes.
- 7:15 Learn how to select a profile.
- 8:21 We show you how to download a certificate.
- 8:55 Learn how to configure the SSO.
- 10:40 We show you how to add parameters.
- 12:33 Learn how to set pages private or public.
- 14:11 We show you how to create a case.
- 16:33 We show you how to view debug mode.
- 18:50 Learn how to do community mapping.
How to Guide
Prerequisites:
- On the Titan Dashboard, click the Settings option.
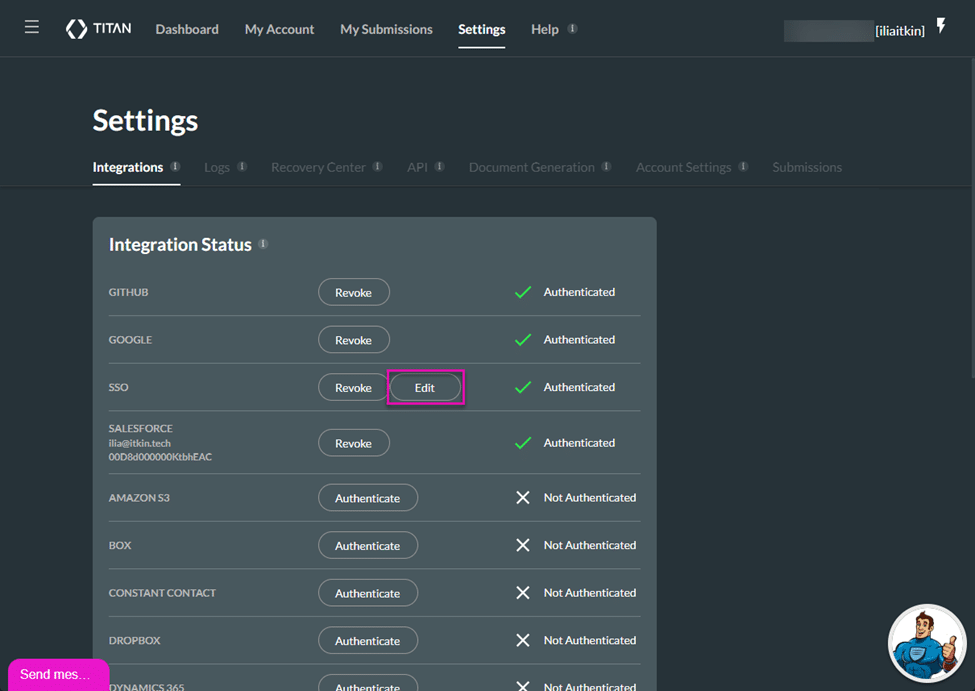
- Click the Integrations tab. The Integrations Status screen opens.
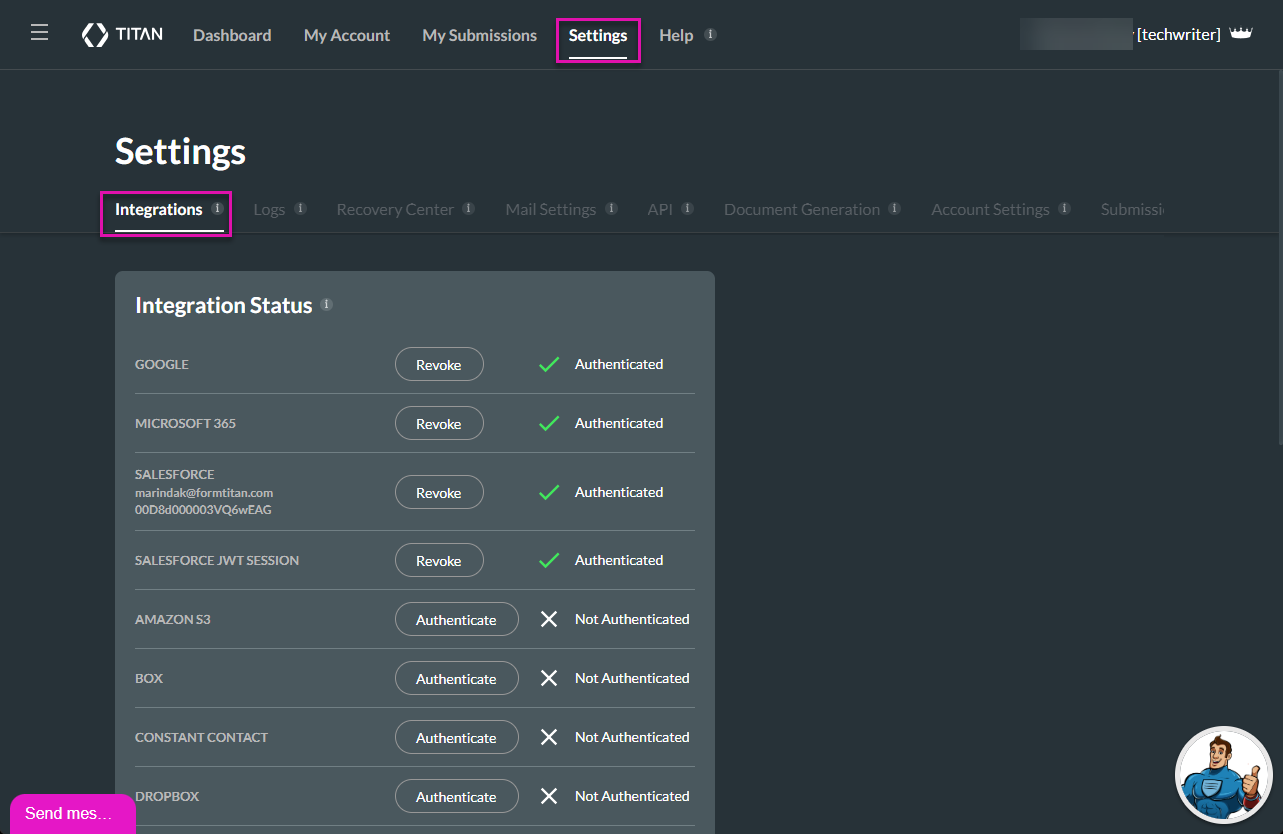
- Scroll down the list to find the SSO option and click the Authenticate button. The SSO Auth screen opens.

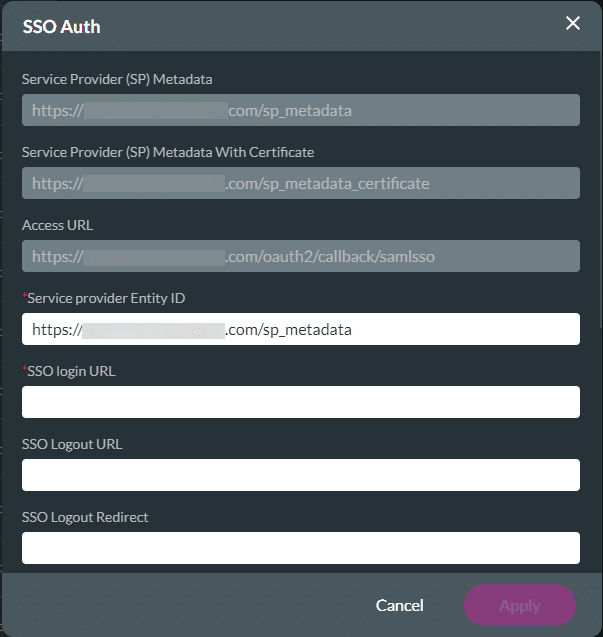
- Configure the SSO Auth fields in Salesforce.
Configure a certificate in Salesforce
- Click the Setup icon in Salesforce and navigate to Certificate and Key Manager.
- Click the Create Self-Signed Certificate button. The Certificate and Key Edit screen opens.

- Type the Label and Unique Name in the relevant fields.
- Click the Save button and click the Download Certificate button. A certificate will be generated.

Configure New Connected App in Salesforce
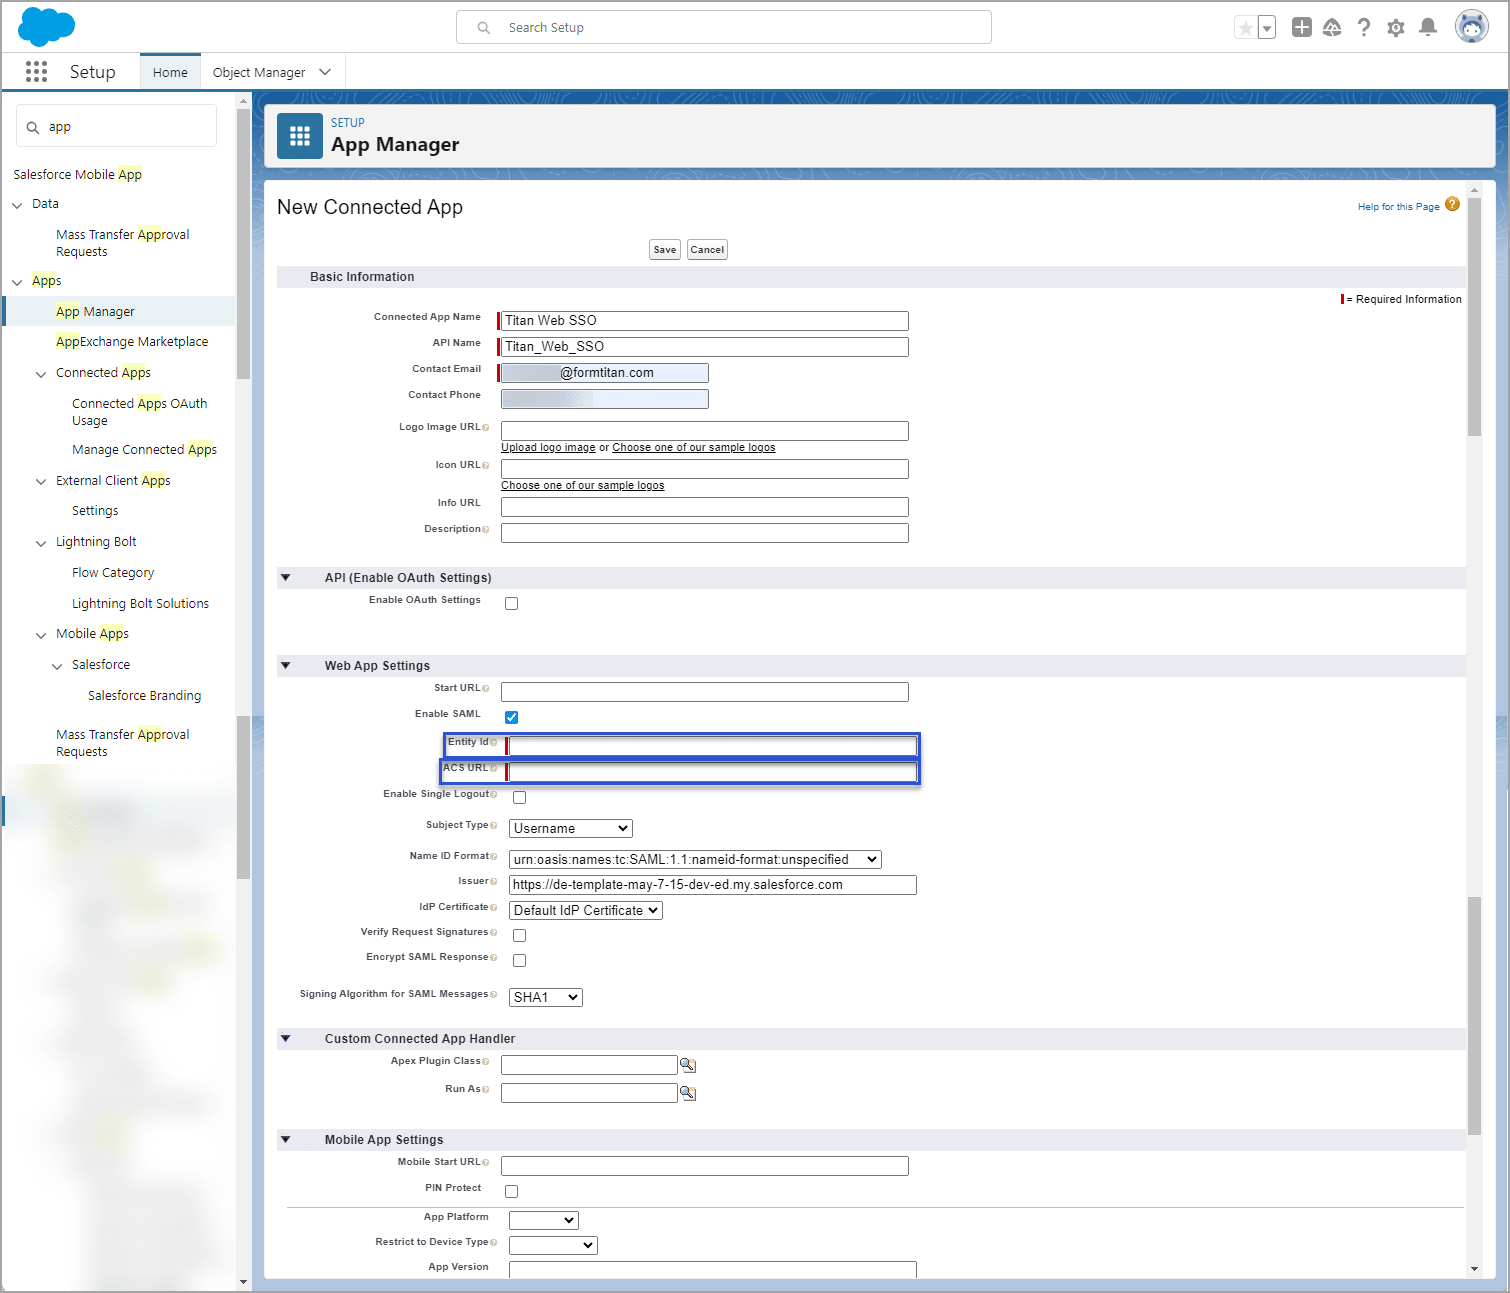
- Click the Setup icon in Salesforce and navigate to App Manager.
- Click the New Connected App button.

- Type the Connected App Name and the API Name in the relevant fields.
- Type the Contact Email address and Enable the SAML checkbox.
- Add the Subject Type in the field and click the subject type, for instance, username.
- Click the Name ID Format, for instance, SAML 2.
- Click the IDP certificate, for instance, the one you are generating or an existing one.

- Navigate to the Titan Dashboard, and copy the Entity ID and the Access URL from the SSO Auth screen.

- Navigate to Salesforce, and paste the Entity ID and the ACS URL in the relevant fields.
- Click the Save button.
Create Custom Attributes in Salesforce
- Click the New button on the Custom Attributes option on the Manage Connected App screen.
- Type the SF Session in the Key field.
- You can insert fields, for instance, label or API Session ID.
- Click the Insert and Save buttons.
- Click the Manage button and copy the SAML Login URL to authenticate a community.
Note:
When you authenticate a community, make sure to select a valid community and log in on the community screen.
Give Profile access to the Connected App
- Click the Manage Profile button and click the profile you want to give access to from the list.
- Navigate to Titan Web and download the certificate you configured in Configure a certificate in Salesforce.
- Paste the certificate where you can read it, and copy and paste it in the Certificate field on the SSO Auth screen.
- Click the Test button to authenticate and click the Apply button.
- Navigate to Titan Web to configure the SSO.
Configure SSO in Titan Web
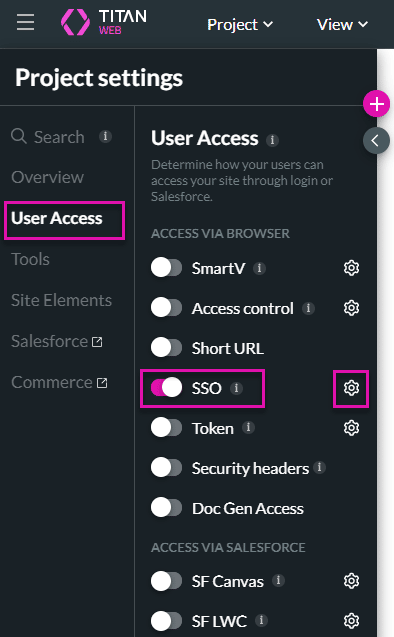
- Click the Gear icon next to the plus (+) icon in Titan Web. The Project settings screen opens.

- Click the User Access option and enable the SSO toggle.
- Click the Gear icon next to the SSO option.
- Click the Use Salesforce session checkbox. Any Salesforce Push or Get will run on the logged-in user’s profile.
- For instance, if a community user creates a new contact in Salesforce, the contact will be created with that user’s profile details.
- Ensure that the users with access to the Web project in Salesforce have all the necessary permissions to use all the objects.
- Click the drop-down list to choose where you want to get the Session ID from Salesforce.
- Map a parameter that you want from SSO. The portal user email and user ID show by default from Salesforce.

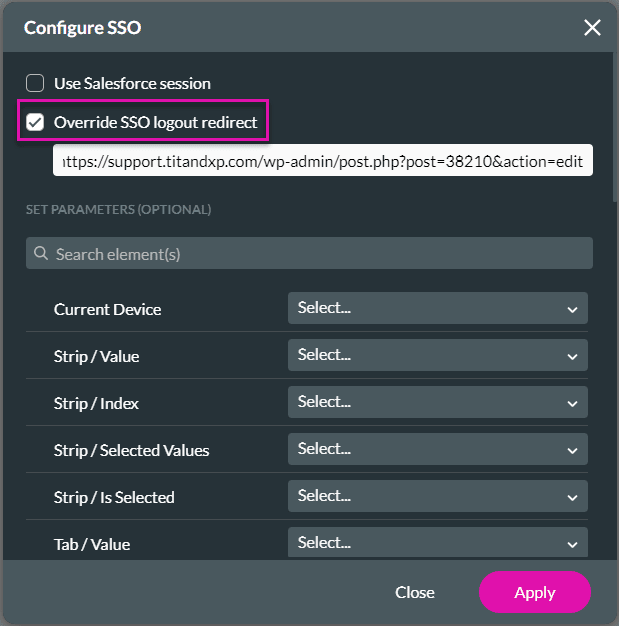
- If necessary, click the Override SSO logout checkbox and click the Apply button. When someone logs out, you can override them with your URL.
- Save the project.
You will be asked to log in first to access your project. A verification code will be sent to your email address to verify your account. You can also set pages in your project to public (available to anyone) or SSO enabled (authenticate verification).
You can edit the SSO settings by clicking the Edit button.
Hidden Title
Was this information helpful?
Let us know so we can improve!
Need more help?
Book Demo